Thursday, May 31, 2012
cake batter truffles
I hope this post brings back happy memories of sprinklers, flip-flops, freeze tag, and other care free summer moments. Memorial Day has come and gone marking the beginning of summer in my book. And this truffle to me is a little package of happy summer moments. Even as an adult, I still love a funfetti cupcake above all others. Why is that? What is it about adding sprinkles to a vanilla cupcake that puts a smile on my face. Now I suppose I enjoyed a funfetti cupcake more than just in the summer moments, but for some reason it just screams back yard barbeque and pool parties.
This is a little twist on the funfetti cupcake- cake batter truffles. You can definitely use whatever vanilla cupcake and vanilla buttercream you would like to make these truffles. I chose a recent recipe I posted earlier about. Why? Well, yes those cupcakes were phenomenal. But like the red velvet cupcakes that recently turned into cheesecake truffles, I had leftover vanilla cupcakes in the freezer that succumbed to the same cake truffle fate. Not a bad way to go if you ask me. Roll me in sprinkles and dip me in white chocolate. You won't hear any complaints for me.
Happy Beginning of Summer everyone.
Vanilla Cupcakes
Adapted from Annie's Eats
For this recipe I had about a dozen leftover cupcakes. I also used about a half portion of the frosting. I added 1-2 Tbs. of sprinkles. This is one of those "eyeball" recipes. I added enough frosting so the cake crumbs came together, and enough sprinkle to satisfy my soul.
Please note: the original recipe called for vanilla bean. I, having none on hand (Let's face it vanilla beans are't cheap!) I simply doubled the vanilla extract to 2 tablespoons. If you choose to use the bean (and I only imagine it can enhance an already great cupcake) scrape the vanilla bean seeds into the bowl of the mixer with the butter and discard the pod (or reserve for another use.)
Ingredients:
3 cups cake flour
1 tbsp. baking powder
½ tsp. salt
16 tbsp. unsalted butter, at room temperature
2 cups sugar
5 large eggs, at room temperature
1¼ cups buttermilk, at room temperature
2 tbsp. vanilla extract
Directions:
1. Preheat the oven to 350° F. Line two cupcake pans with paper liners. Set aside.
2. In a medium mixing bowl, combine the cake flour, baking powder and salt. Whisk together and set aside.
3.Add the butter to the bowl of an electric mixer fitted with the paddle attachment. Beat on medium-high speed for 3 minutes, until light and creamy in color. Scrape down the sides of the bowl and beat for one more minute.
4.Add the sugar to the butter mixture, ¼ cup at a time, beating 1 minute after each addition. Mix in the eggs one at a time until incorporated. Scrape down the sides of the bowl after each addition. Combine the buttermilk and the vanilla extract in a liquid measuring cup. With the mixer on low speed, add the dry ingredients alternately with the wet ingredients, beginning and ending with the dry ingredients and mixing just until incorporated. Scrape down the sides of the bowl and mix for 15 seconds longer.
5.Divide the batter between the prepared paper liners, filling each about 2/3 of the way full (you will likely have batter left over after filling 24 wells.I managed to make a full 3 dozen cupcakes) Bake 18-22 minutes, or until a toothpick inserted in the center comes out clean. Allow to cool in the pans 5-10 minutes, then transfer to a cooling rack to cool completely. Replace paper liners and bake remaining batter if desired. Frost cooled cupcakes as desired.
Yield: approximately 30 cupcakes (like I said I got 36 cupcakes!)
Easy Vanilla ButtercreamIngredients:20 tbsp. (2 ½ sticks) unsalted butter, softened2 ½ cups confectioners’ sugar, sifted1/8 tsp. salt2 tsp. vanilla extract2 tbsp. heavy cream Directions:In a stand mixer fitted with the whisk attachment, beat butter at medium-high speed until smooth, about 20 seconds. Add confectioners’ sugar and salt; beat at medium-low speed until most of the sugar is moistened, about 45 seconds. Scrape down the bowl and beat at medium speed until mixture is fully combined, about 15 seconds. Scrape bowl, add vanilla and heavy cream, and beat at medium speed until incorporated, about 10 seconds. Then increase the speed to medium-high and beat until light and fluffy, about 4 minutes, scraping down bowl once or twice.
Tuesday, May 29, 2012
red velvet cheesecake truffles
What makes red velvet cake better? Add cheesecake. I had some leftover red velvet cupcakes in the freezer that were taking up way too much space. I wanted to do something different with them then simply de-frost and ice with frosting. (Not that it would be a bad idea.) That was when I found this recipe, for carrot cake truffles, originally from Momofuku Milk Bar. These are similar to a cake pop, but instead of combining cake crumbs with frosting, you combine it with what is called liquid cheesecake. It is cupcake meets cheesecake meets truffle. Sorry bikini season..you are just going to have to wait.
To make the liquid cheesecake:
With a mixer, cream the cream cheese for two minutes.
Add the sugar.
Cream for another 3-4 minutes until smooth.
In another bowl, combine the cornstarch and salt. Then add your milk and egg and whisk until it is all combined.
Combine the egg mixture with the cream cheese mixture. Mix until combined. Then pour into a lined pan. Then Bake!
For the cake crumbs:
In a bowl, crumble the cupcakes with a fork. Until they look like this:
Then add the liquid cheesecake and roll into balls.
For the red velvet cupcakes (for this recipe I used 12 cupcakes)
2½ cups cake flour
1½ cups sugar
1 tsp. baking soda
2 tbsp. cocoa powder
1 tsp. salt
2 large eggs
1½ cups vegetable oil
1 cup buttermilk
2 tbsp. (1 oz.) liquid red food coloring
1 tsp. vanilla extract
1 tsp. distilled white vinegar
For the frosting:*
8 oz. cream cheese
5 tbsp. unsalted butter, at room temperature
2 tsp. vanilla extract
2½ cups confectioners’ sugar, sifted
Directions:
Preheat the oven to 350° F. Line cupcake pans with paper liners. In a medium bowl, combine the cake flour, sugar, baking soda, cocoa powder and salt; whisk to blend. In the bowl of an electric mixer, combine the eggs, vegetable oil, buttermilk, food coloring, vanilla and vinegar. Beat on medium speed until well blended. Mix in the dry ingredients on low speed and beat until smooth, about 2 minutes.
Divide the batter evenly between the prepared liners. Bake, rotating the pans halfway through baking, until a toothpick inserted in the center comes out clean, about 18 minutes. Let cool in the pans 5-10 minutes, then transfer to a wire rack to cool completely.
To make the frosting, combine the cream cheese and butter in the bowl of an electric mixer. Beat on medium-high speed until well combined and smooth, about 2-3 minutes. Mix in the vanilla extract. Gradually beat in the confectioners’ sugar until totally incorporated, increase the speed and then beat until smooth. Frost cooled cupcakes as desired. (I used a large, unlabeled star tip to frost these cupcakes.)
For the liquid cheesecake:
8 oz. cream cheese
3/4 c. white sugar, granulated
1 tbsp. cornstarch
1/2 tsp. salt
2 tbsp. milk, whole
1 large egg
8 oz. cream cheese
3/4 c. white sugar, granulated
1 tbsp. cornstarch
1/2 tsp. salt
2 tbsp. milk, whole
1 large egg
Preheat oven to 300°.
Put cream cheese into a medium sized bowl and, using an electric
mixer, beat on medium speed for 2 minutes. Scrape down the sides of the
bowl with a spatula. Add the sugar and mix for 1-2 minutes until the
sugar has been completely incorporated. Scrape down the sides of the
bowl.
Whisk together the cornstarch and salt in a medium bowl. Whisk in the
milk in a slow, steady stream, then whisk in the egg until the slurry
is homogenous.
With the mixer on a medium-low speed, stream in the egg slurry.
Paddle for 3-4 minutes until the mixture is smooth and loose. Scrape
down the sides of the bowl.
Line the sides and bottom of a 6″ x 6″ baking pan with plastic wrap.
Pour the cheesecake batter into the pan and bake for 15 minutes. It is
done when it is set on the edges but still jiggly in the center. If the
edges aren’t quite set, bake for 5 minute increments until it’s done, no
more than 25 minutes.
Cool completely to finish the baking process and allow the cheesecake
to set. It will be creamy and spreadable and can be stored in the
fridge in an air-tight container for up to a week.
For the truffles:
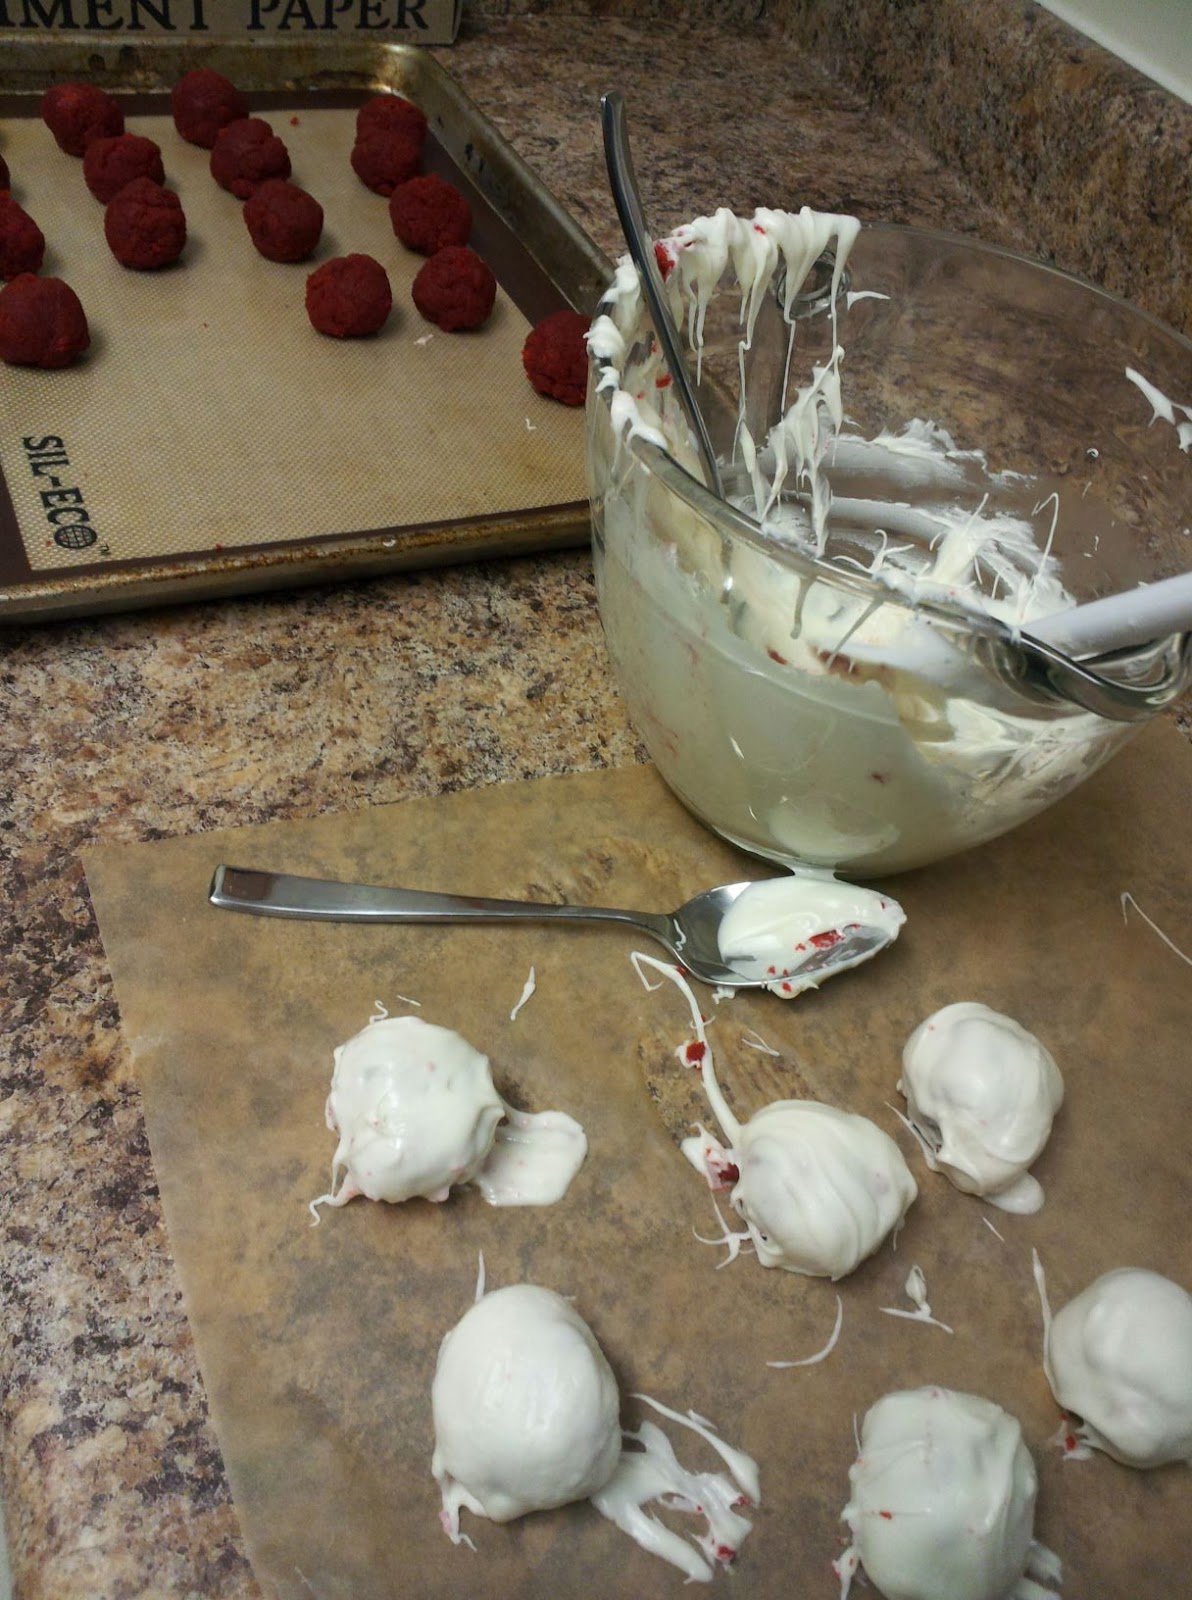
Please note: I used 12 regular sized cupcakes for this recipe so I had a little bit more than the recipe called for, I just added a few more tablespoons of the liquid cheesecake. I was able to get almost 2 dozen truffles with the cupcakes. If you don't have red velvet? Feel free to use any flavored cupcake. I just happen to have red velvet in my freezer.
3-4 c. cake scraps
3-4 c. cake scraps
2-4 tbsp. liquid cheesecake
white chocolate, melted
Combine the crushed-up cake with 2 tablespoons of the liquid
cheesecake. Mix using your hands. If it is moist enough to knead into a
ball then you’re set, if not add some more liquid cheesecake until it
will hold its shape. Portion out 12-14 balls of the mixture.
Dip each ball of cake into the white chocolate until well coated. Place finished truffles on parchment paper
and put them in the fridge for at least 5 minutes to fully set the
chocolate before serving. Truffles can be stored in an airtight
container for up to a week.
Saturday, May 26, 2012
nutella scones
These scones are WICKED good. Now if you are from the New England area, you know that wicked is a the highest form of a compliment. These. Are. Good. No, better than good. What's better than good? Well...these scones are! If you haven't crawled out from under the same rock I had been under most of my life where nutella did not exist, then let me give you a lending hand. Nutella is to put it simply a chocolate hazelnut spread. Sounds so innocent right? Then you open up the jar, tear back the shiny gold covering, and dip your finger in it (because who is looking right?) And you taste..and you sigh and smile. Everything for that moment is right in the world.
I had leftover heavy cream and (believe it or not) an unopened jar of Nutella just sitting there taunting me from the cupboard shelves. I found this recipe for Nutella scones from the Baked cookbook. I have also tried making their sweet and salty cake (a recipe I have yet to share, but was equally delicious). These scones were a bit crumbly in the process. I added a few more tablespoons of heavy cream. Not sure if that was the way the dough was suppossed to be or if it was the lovely sunny day wreaking havoc on my scones. Either way, I proceeded. The entire scone dough once mixed and turned out onto the surface, gets a nice thick layer of Nutella spread it over. Then you simply roll the dough back up and flatten it back into a circle and cut into wedges.
These scones were a tad dry, as scones can sometimes be. The Nutella drizzle over the scones does help. How do you make it even better? Don't drizzle..spread a nice thick layer of Nutella over the scones once cooled. I know...it's wicked. But oh is it so, so good.
Nutella Scones
Please note: I omitted the hazelnuts. After searching every grocery aisle twice with no luck finding them, I gave up on adding hazelnuts to my recipe. The crunch would have been nice, but they were still good with out. Feel free to add or omit hazelnuts to your scones. Whatever you do though,do not omit this recipe from your life.
There is also a great step-by-step tutorial of how to make these scones here.
Yield: 6-8 scones
Ingredients:
2 cups unbleached all-purpose flour
1/4 cup granulated sugar
1/4 cup dark unsweetened cocoa powder (like Valrhona)
1 tablespoon baking powder
1/2 teaspoon salt
6 tablespoons (3/4 stick) cold unsalted butter, cut into chunks
1 large egg
1/2 cup heavy cream
3/4 cup toasted hazelnuts,coarsely chopped
1/2 cup Nutella
*Baked Note*
Matt & Renato’s advice: Do Not Knead Too Much. Stop working the dough the minute it comes together and don’t worry if there are a few dry bits scattered throughout.
Directions:
Preheat the oven to 375 degrees F and place the rack in the center. Line a baking sheet with parchment paper. In a large bowl, whisk the flour, sugar, cocoa powder, baking powder, and salt until combined.
Add the butter. Use your fingertips to rub it into the flour until the butter is pea size and the mixture is coarse.
In a separate bowl, whisk together the egg and cream. Slowly pour the wet ingredients into the dry ingredients and stir until the dough just comes together. Gently and briefly knead the dough with your hands. Add the toasted hazelnuts and knead gently to incorporate. Flatten the dough into a rectangle approximately 6 by 12 inches. ( it doesn’t need to precise) and spread 1/4 cup of the Nutella on top in a criss cross pattern. Roll the dough up to make a cylinder about 6 inches long, turn it on its end, and gently flatten it into a disk about 1 3/4 inches high. Do not overwork the dough.
Cut the dough into 6 or 8 wedges and place them on the prepared baking sheet. Bake the scones for 18-20 minutes, rotating the baking sheet halfway through, or until a toothpick inserted into the center of a scone comes out clean. Do not overbake. Transfer the scones to a wire rack to cool completely. Place the baking sheet with the parchment still on it underneath the rack.
Assemble the Nutella Scones:
Heat the remaining 1/4 cup Nutella in a microwave until pourable, about 10 seconds on high. Pierce the tops of the scones a few times with a fork. Use a spoon ( or two spoons-one to scoop, one to scrape) to drip the warm Nutella in a zigzag pattern over the tops of the hot scones. Transfer them to a refrigerator to set for 5 minutes, then serve immediately.
Most scones have a lifespan of 24hours or less; however, these scones taste pretty darn good on day two provided you wrap them tightly and store them at room temperature.
I had leftover heavy cream and (believe it or not) an unopened jar of Nutella just sitting there taunting me from the cupboard shelves. I found this recipe for Nutella scones from the Baked cookbook. I have also tried making their sweet and salty cake (a recipe I have yet to share, but was equally delicious). These scones were a bit crumbly in the process. I added a few more tablespoons of heavy cream. Not sure if that was the way the dough was suppossed to be or if it was the lovely sunny day wreaking havoc on my scones. Either way, I proceeded. The entire scone dough once mixed and turned out onto the surface, gets a nice thick layer of Nutella spread it over. Then you simply roll the dough back up and flatten it back into a circle and cut into wedges.
These scones were a tad dry, as scones can sometimes be. The Nutella drizzle over the scones does help. How do you make it even better? Don't drizzle..spread a nice thick layer of Nutella over the scones once cooled. I know...it's wicked. But oh is it so, so good.
Nutella Scones
Please note: I omitted the hazelnuts. After searching every grocery aisle twice with no luck finding them, I gave up on adding hazelnuts to my recipe. The crunch would have been nice, but they were still good with out. Feel free to add or omit hazelnuts to your scones. Whatever you do though,do not omit this recipe from your life.
There is also a great step-by-step tutorial of how to make these scones here.
Yield: 6-8 scones
Ingredients:
2 cups unbleached all-purpose flour
1/4 cup granulated sugar
1/4 cup dark unsweetened cocoa powder (like Valrhona)
1 tablespoon baking powder
1/2 teaspoon salt
6 tablespoons (3/4 stick) cold unsalted butter, cut into chunks
1 large egg
1/2 cup heavy cream
3/4 cup toasted hazelnuts,coarsely chopped
1/2 cup Nutella
*Baked Note*
Matt & Renato’s advice: Do Not Knead Too Much. Stop working the dough the minute it comes together and don’t worry if there are a few dry bits scattered throughout.
Directions:
Preheat the oven to 375 degrees F and place the rack in the center. Line a baking sheet with parchment paper. In a large bowl, whisk the flour, sugar, cocoa powder, baking powder, and salt until combined.
Add the butter. Use your fingertips to rub it into the flour until the butter is pea size and the mixture is coarse.
In a separate bowl, whisk together the egg and cream. Slowly pour the wet ingredients into the dry ingredients and stir until the dough just comes together. Gently and briefly knead the dough with your hands. Add the toasted hazelnuts and knead gently to incorporate. Flatten the dough into a rectangle approximately 6 by 12 inches. ( it doesn’t need to precise) and spread 1/4 cup of the Nutella on top in a criss cross pattern. Roll the dough up to make a cylinder about 6 inches long, turn it on its end, and gently flatten it into a disk about 1 3/4 inches high. Do not overwork the dough.
Cut the dough into 6 or 8 wedges and place them on the prepared baking sheet. Bake the scones for 18-20 minutes, rotating the baking sheet halfway through, or until a toothpick inserted into the center of a scone comes out clean. Do not overbake. Transfer the scones to a wire rack to cool completely. Place the baking sheet with the parchment still on it underneath the rack.
Assemble the Nutella Scones:
Heat the remaining 1/4 cup Nutella in a microwave until pourable, about 10 seconds on high. Pierce the tops of the scones a few times with a fork. Use a spoon ( or two spoons-one to scoop, one to scrape) to drip the warm Nutella in a zigzag pattern over the tops of the hot scones. Transfer them to a refrigerator to set for 5 minutes, then serve immediately.
Most scones have a lifespan of 24hours or less; however, these scones taste pretty darn good on day two provided you wrap them tightly and store them at room temperature.
Subscribe to:
Posts (Atom)