Friday, March 30, 2012

Spaghetti with Shrimp and Braised Kale


Kale is the new black of the vegetable world if you ask me. I have to admit I had not heard of this leafy green until recently. Now its kale this and kale that. And can you blame it? This is one powerhouse of a food.  It can lower your cholesterol, help fend off 5 different kinds of cancer, and is chocked  full of antioxidants and rich (#1 to be exact in all the leafy green veggies) in Vitamin K. If it could just clean my kitchen we would be all set me and kale.  I bought two bunches of this stuff to give kale chips a try (better than potato chips I heard!). Although they were quite delicious, comparing kale chips to potato chips is like comparing my favorite pair of heels to my best worn in sandals. Both are great in their own way and serves a need when I need not exactly a fair comparison.

After I made a batch of kale chips, I still had one bunch left. What to do? I quickly found this recipe on Bon Appetit for spaghetti with braised kale. I changed it slightly by adding sauteed shrimp in with the dish. This dish was everything you would want it to be- quick, healthy, and affordable. Oh and it was delicious. Kale and I are going to get along just fine. 

Spaghetti with Shrimp and Braised Kale
Adapted from Bon Appetit, October 2009

While making this, I don't know if I got "lacinato kale" nor do I personally think it matters. I bought the only kale I saw in my produce aisle and I suggest you do the same! I also seasoned my kale with salt, pepper, and a little red pepper flakes. That is entirely optional. I personally liked the little heat from the red pepper. As for the shrimp, I again have you use your best judgement on the amount you want to add. I used up what I had which was about 5 shrimp per serving. I also added vegetable broth to my kale during the cooking process instead of water to amp up the flavor. Don't have it? Don't bother. Use water as the original recipe intended. 

  • 1 pound lacinato kale (about 2 bunches), large center ribs and stems removed, cut crosswise into 1/2-inch slices (Now I have to admit I don't know if I got the right kind of kale, so use whatever is available in your produce aisle!)
  • 3 tablespoons olive oil, divided
  • 1 medium onion, finely chopped (about 1 1/2 cups)
  • 8 large garlic cloves, thinly sliced
  • 1/2 pound spaghetti
  • 2 teaspoons fresh lemon juice
  • Finely grated Parmesan cheese
  • Shrimp, thawed, peeled, and deveined
  • Water (or vegetable broth)

Preparation

  • Rinse kale. Drain; transfer to bowl with some water still clinging.
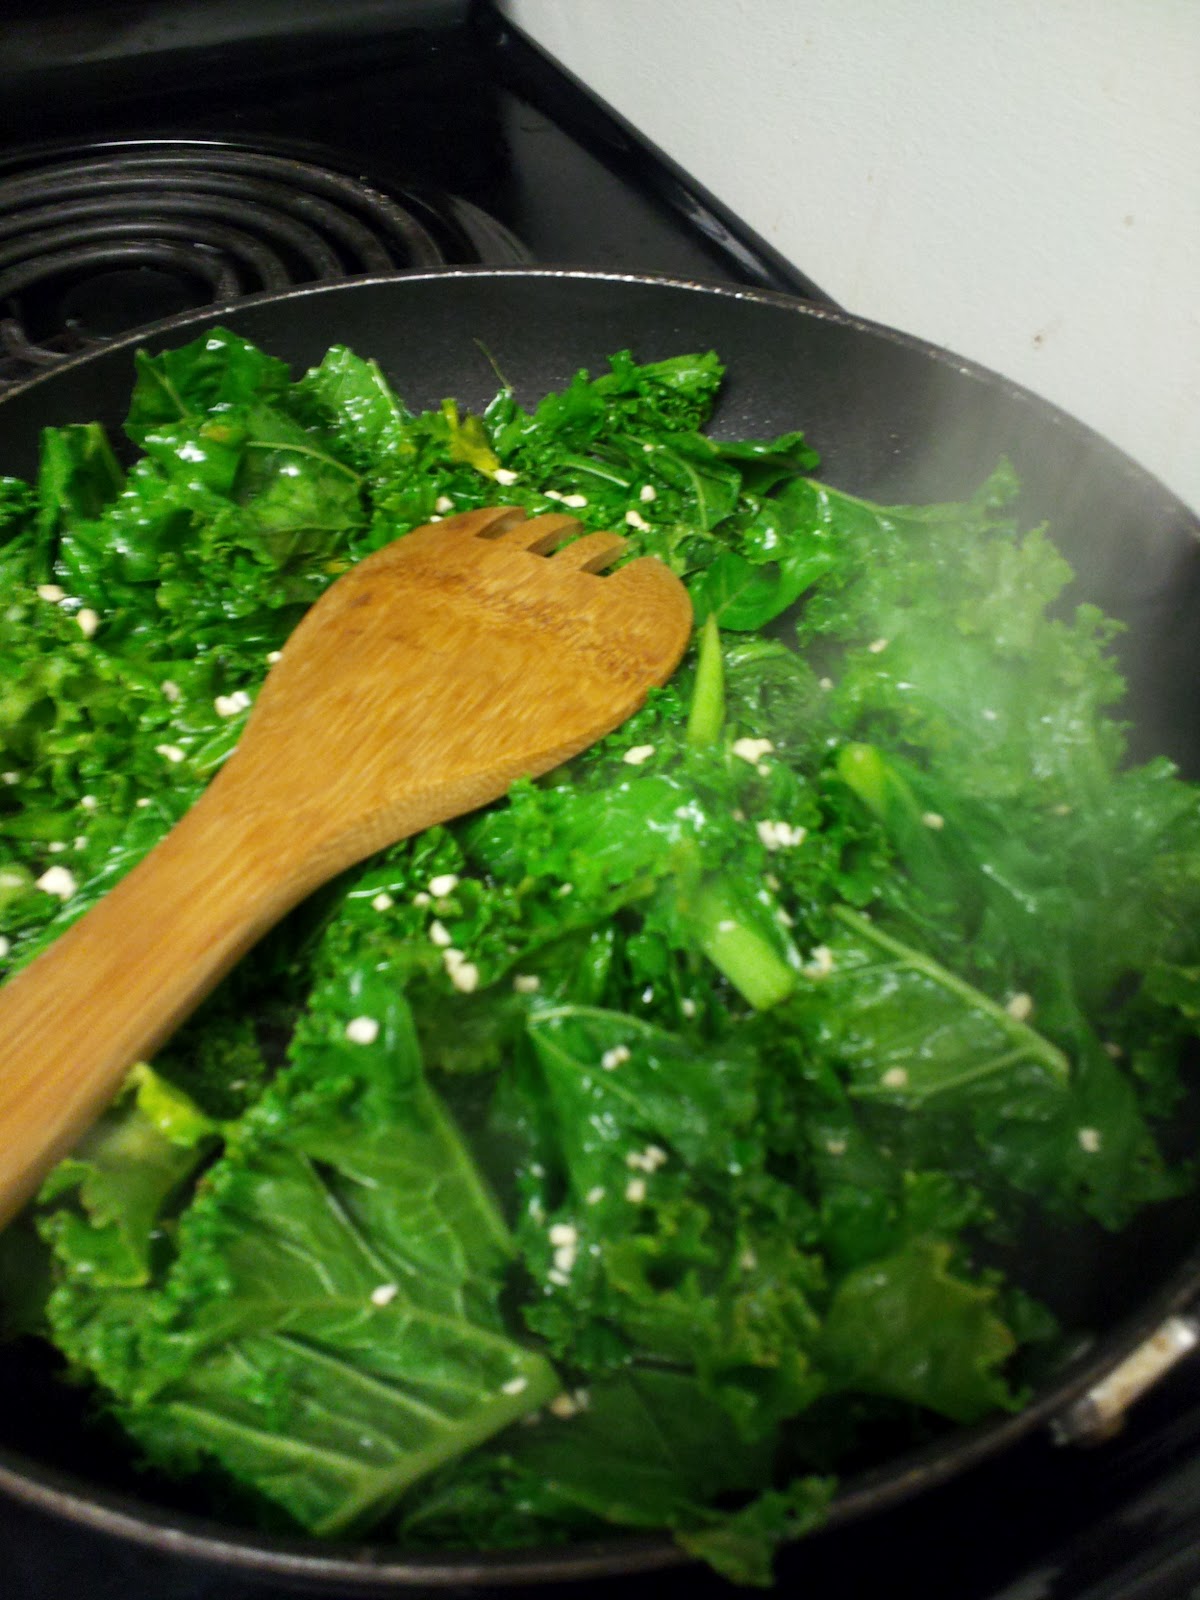
  • Heat 2 tablespoons olive oil in heavy large pot over medium heat. Add chopped onion and cook until soft and translucent, stirring occasionally, about 6 minutes. Add sliced garlic and sprinkle with salt; cook until onion is golden brown, stirring occasionally, about 5 minutes. Add kale and remaining 1 tablespoon olive oil and toss until wilted, about 3 minutes. Cover pot and reduce heat to medium-low. Continue cooking until kale is very tender, stirring occasionally and adding water by teaspoonfuls if dry, about 20 minutes.
    In the same pan push the kale to one side and add your shrimp  to cook. 
  • Meanwhile, cook spaghetti in medium pot of boiling salted water until tender but still firm to bite, stirring occasionally. Drain, reserving 1/4 cup cooking liquid. Add cooked spaghetti to kale and shrimp mixture in pot. Add lemon juice and 2 tablespoons reserved cooking liquid; toss to combine, adding more liquid by tablespoonfuls if dry. Sprinkle spaghetti with grated Parmesan cheese and serve.


Thursday, March 29, 2012

Diner Brownies

There are two types of people in this world...those who like fudgy brownies and those who like cakey brownies. What about those who don't like brownies, you ask? I don't believe they actually exist. At least I have not met them anyway.  I come from the "fudgy brownie" camp. It is perhaps that reason I am not the biggest fan of this recipe.  This is a cakey brownie topped with a luscious and simple chocolate frosting. If I want cake, I'll make a cake. If I want a brownie, I want a BROWNIE. Fudgy, dense, rich. It is after as legend has it the brownie's origin is that a housewife while making a cake forgot to add the baking powder and voila! the brownie was born!  So to me, this recipe just doesn't cut it when I am craving a brownie due to its more cake-like texture.

But you knew it was a cakey brownie recipe when you started, you cry!

Yes, yes I know. Oh well perhaps all you cakey brownie fans will enjoy this recipe. I know my co-workers still did despite my warnings (I don't know how good it is! I won't be offended if you throw it out!)

**P.s  Although I was at first not a fan, it did not stop me from devouring one as soon as they came out the oven and one more this morning for breakfast. (and  packed one away for lunch). Ok--by lunchtime I was a fan. Who am I kidding? It was chocolate covered chocolate.

Diner Brownies
From Food Network

Ingredients:
1 3/4 flour
3 Tbs. cocoa powder
1 tsp. Salt
1 tsp baking powder
2 sticks Butter
2 1/2 cups brown sugar
1 cup water
6 oz. unsweetened chocolate, chopped
5 eggs
2 tsp. vanilla

1. Preheat the oven to 325 degrees. Coat a 9-by-13 inch pan with cooking spray.  (For easy removal, line with foil).
2. Whisk the flour, cocoa powder, salt, and baking powder in a bowl. Set aside.
3.. In a large saucepan bring the butter, brown sugar, and water to a simmer.
4. Remove the saucepan from the heat and whisk in the chopped chocolate. Cool slightly.
5. Whisk in the eggs, one at a time.
6. Stir in the flour mixture.
7. Spread in a pan and bake for 30 to 35 minutes.
8. Once cooled, top with chocolate frosting.

Chocolate Frosting

Ingredients:
4 oz butter, softened
1 1/4 cups confectioner's sugar
3 Tbs. cocoa powder
2 Tbs. milk
1/2 tsp. vanilla

Beat butter, sugar, cocoa powder, milk and vanilla until a creamy consistency is reached.

Tuesday, March 27, 2012

Broccoli-Cheese Soup

I have always been a little imitidated by making soups. I'm not sure where this fear originated from, but I decided to conquer it after all. I threw open the closet door, expecting a big hair soup monster to attack me and lo and behold- there was nothing there. There is nothing to fear but fear itself. Aw such wise words. Fear not! Soup is easy!

Soup seems to be such a great way to use up ANYTHING you have in the fridge that is mocking you by not having been used.  I had some leftover broccolli in the fridge staring me down begging to be used. I knew I had chicken stock, some heavy cream (freshly purchased to make my favorite scones later this week) and knew I would have extra. So- here I was all the components to make a great soup lay before me. All that was standing in my way was fear. Perhaps that is what I love about being in the kitchen the most- it is always a challenge and always a learning experience.

I did a quick internet search for broccoli soups (with cheese of course!) and found a few similar recipes on Annie's Eat's blog and The Curvy Carrot.  I adapted to what I had on hand, and lightened it up a bit by reducing the cream, and using more of the milk (1%, to make it even lighter). I used fat free chicken broth as oppossed to vegetable broth (sorry vegetarians- but it was in my fridge!) I did not have cheddar cheese, but a montery-cheddar blend. Hey, the only bad cheese is no cheese right? I also subsituted out the bay leaves -(again- just wasn't in my fridge!) and had some leftover thyme from my herb-roasted potatoes and decided what the heck, I'll use up those!

There was one moment where I was about to throw in the proverbial soup towel. I had begun making my roux with the flour and butter. Good things were occurring. I added my cream and began to stir. Still all was well. Then when I added the broth, some icky coagulation between heavy cream and broth began to occur. A happy marriage it was not- but I kept stirring! This is blissful union in the end. Fear not!

Upon first spoonful- absolute bliss! My soup monster is gone! Throw away my closet door (if you have seen Monsters, Inc. ever you know what I'm talking about)..I am no longer afraid. I'm now currently hunting down more soup recipes. 

*** I made a smaller batch of this. Eight servings?! (I was making it for 2..and a few lunches for the next day so a half batch was all I needed.) If it becomes a little too thick, thin it out with a little more broth or milk until the desired consistency is again reached.

Here is the final version of what I came up with:

Broccoli Cheese Soup
Servings: approximately 8 servings
Ingredients
3 tablespoons unsalted butter
1/2 small onion, chopped
1/4 cup flour
1 1/2 cups milk (I used 1%)
1/2 cup heavy cream
3 cup vegetable broth (plus more if needed) (I used fat free chicken broth)
Pinch nutmeg
3-4 sprigs of fresh thyme
Salt and pepper, to taste
2 carrots, grated
4 cups broccoli florets
8 ounces shredded monterey-jack and cheddar cheese blend
Instructions
1. In a sauté pan over medium-high heat, melt the butter.
2. Add the onion and cook until translucent, about 4-5 minutes, stirring frequently.
3. Remove the onions from the heat and set aside.
4. In a large Dutch oven or sauce pot over medium heat, whisk together the flour, milk, and cream.**It’s very important to be PATIENT here and whisk continuously.  The mixture will be lumpy, but it will smooth out eventually with the heat.
5. Whisking constantly, add the vegetable broth until smooth.
6. Add the nutmeg, bay leaves, and salt and pepper (to taste) and let the mixture simmer,uncovered, for about 20 minutes.
7. Add the cooked onions, broccoli, and carrot, mixing well.  Let simmer for another 20 minutes.
8.  Add the cheese and stir until completely melted, adding more broth if necessary.


Herb Roasted Potatoes

For some reason when someone asks, "bring a side dish" my mind goes blank. It's the day of the big test I studied all day then the test arrives and my mind goes BLANK. You know that feeling.  For some reason I feel in my baking/cooking bag of tricks, I am low on arsenal in the side dish department.  Thank goodness for google! I turned to a trusted website, Williams-Sonoma for some ideas.

I found this recipe for roasted new potatoes. Now my grocery store didn't have new potatoes, but they did have these "little potatoes" from the aptly named, Little Potato Company. How cute? And in red, white, and blue colors! I'm going to have remember these little guys when it comes to the Fourth of July. What a fun potato salad these would make, don't you think?

Anyway I'm getting sidetracked! This recipe was quick and simple and delicious with the use of fresh herbs. Fresh herbs can get expensive but I was able to find a "savory bouquet" which had rosemary, thyme, and sage in the container. A whole lot cheaper but plenty of wonderful herbs as oppossed to buying a package of each of rosemary and thyme as the recipe called for.

I halved this recipe, since it was only 4 1/2 for dinner. And we still had extra! I spread them out on a cookie sheet, because I love letting every little potato get its time in the sun..err stove.  This side dish was truly simple and in the words of Ina Garten, "How easy was that?"

Herb-Roasted Potatoes

Ingredients:

  • 4 lb. red new potatoes, quartered (or whatever small potatoes are lurking in your produce aisle that day!)
  • 1/4 cup olive oil
  • 1 Tbs. chopped fresh rosemary
  • 1 Tbs. chopped fresh thyme
  • Salt and freshly ground pepper, to taste

Directions:

Preheat an oven to 400°F.

In a bowl, combine the potatoes, olive oil, rosemary, thyme, salt and pepper and stir to coat the potatoes evenly. Transfer to a buffet pan and roast until the potatoes are tender, golden brown and crisp, about 1 hour. Serve immediately.
Serves 10.

Monday, March 26, 2012

Blueberry-Lemon Scones

It's official! I want to scream it from the rooftops! I LOVE Scones! (insert emoticon here). When I was baking up the strawberry-orange scones I had some leftover blueberries in the fridge. They were at that point- one day they are just fine, the next sad wrinkly blue messes. I had to rescue them and turn them into something fantastic. Having just whipped up a batch of the strawberry-orange scones. I decided why not one more batch? My counter was already floured up. My bowl already covered in doughy bits. What is one more hour in the kitchen? Pure heaven in my book.

I used the same recipe that I used for the strawberry-orange scones. I substituted in the soon to be sad blueberries if not rescued upon that very Sunday.  I finished these off with a fresh lemon glaze and called it a fantastic Sunday morning.

I hope these two recent scone recipes have given you a little bit of inspiration to create your own fabulous scones.  Stay tuned..I plan to whip up another batch using my favorite scone recipe later in the week with one of my favorite additions to life, love and baking- chocolate!

Blueberry-Lemon Scones

Makes 8 scones
1½ cups all-purpose flour
½ cup cake flour (not self-rising)
3 tablespoons granulated sugar
2½ teaspoons baking powder
¾ teaspoon salt
4 ounces (1 stick) cold unsalted butter, cut into small pieces
1 cup (½ pint) blueberries
½ cup buttermilk (I chose to make my own by adding 1/2 Tbs. of lemon juice to milk)
1 large egg
½ teaspoon vanilla extract
1. Preheat oven to 375 degrees F. Line a baking sheet with parchment.
2. Whisk together flours, sugar, baking powder and salt in a large bowl. Cut in butter with a pastry blender or rub in with your fingers, until the mixture has the texture of coarse meal. Fold in blueberries. Include the zest of 1 lemon.
3. Whisk together buttermilk, 1 egg, and the vanilla. Drizzle over flour mixture, and stir lightly with a fork until dough comes together but a small amount of flour remains in the bowl.
4. Turn out dough onto a work surface, and gently knead dough once or twice just to incorporate flour. Pat dough into a 1-inch thick round. Cut into 12 (again I always manage to get only 8) wedges. Transfer to prepared baking sheet.  Bake until golden brown and cooked through, about 22 minutes. Transfer scones to wire rack to cool.
5.  Once cooled, drizzle with orange icing if desired.I tend to use a lot, but well I like icing- add as little or as much as you want! If you do not prefer icing, you could always make an egg wash and brush on the scones  before baking and sprinkle some sanding sugar on top.
Serving & storing: The scones are best served immediately, but can be frozen for up to 1 month. Thaw, and reheat in a 350-degree oven for 10 minutes.
Lemon Icing
1/2 cup, confectioner's sugar
zest of 1 lemon
Juice of 1/2 lemon (to taste)

1. Combine all ingredients in a bowl and whisk to combine.
2. Once scones are cooled, drizzle on top

Saturday, March 24, 2012

Strawberry-Orange Buttermilk Scones

I have gone through a love/hate relationship with scones. I worked at a bakery this past summer and it was my job to make batch after batch of scones.  Let's just say making 9 batches a day by hand is one heck of an arm workout. So by the end of that summer I never wanted to see another scone...or so I thought.

Now that I am back in my own kitchen, I have come to appreciate the simplicity of the scone.  One bowl, a whisk, and a spatula is about all you need. And they are are done in about less than an hour! How great is that? So I guess scones and me are giving this relationship another chance. They were always good to me. And I do have some nice triceps out of the deal as well I suppose.

I adapted this recipe from another blog, The Brown-Eyed Baker, and got the inspiration from Annie's-Eats blog. Two really great blogs I highly recommend you check out if you haven't done so already.  Two great blogs that have inspired me to start my own. Their blogs are light years ahead of mine in sophistication and photography- whereas mine is not even at toddler stage..but I'm gaining..

These scones were everything a scone should be. Buttery, flaky, tender, sweet, and not dry at all! The strawberries were wonderful and I believe I honestly could have added more. But that is just me. The orange icing was the perfect accompaniment. The original recipe says they make 12- I always make a batch of 8 scones. You may also notice there is one missing in the picture-- a chef must taste their creation! Enjoy!

Strawberry-Orange Buttermilk Scones
Adapted originally from Martha Stewart


Makes 8 scones
1½ cups all-purpose flour
½ cup cake flour (not self-rising)
3 tablespoons granulated sugar
2½ teaspoons baking powder
¾ teaspoon salt
4 ounces (1 stick) cold unsalted butter, cut into small pieces
1 cup (½ pint) strawberries
½ cup buttermilk (I chose to make my own by adding 1/2 Tbs. of lemon juice to milk)
1 large egg
½ teaspoon vanilla extract
1. Preheat oven to 375 degrees F. Line a baking sheet with parchment.
2. Whisk together flours, sugar, baking powder and salt in a large bowl. Cut in butter with a pastry blender or rub in with your fingers, until the mixture has the texture of coarse meal. Stir in strawberries. Include the zest of 1 orange.
3. Whisk together buttermilk, 1 egg, and the vanilla. Drizzle over flour mixture, and stir lightly with a fork until dough comes together but a small amount of flour remains in the bowl.
4. Turn out dough onto a work surface, and gently knead dough once or twice just to incorporate flour. Pat dough into a 1-inch thick round. Cut into 12 (again I always manage to get only 8) wedges. Transfer to prepared baking sheet.  Bake until golden brown and cooked through, about 22 minutes. Transfer scones to wire rack to cool.
5.  Once cooled, drizzle with orange icing if desired.I tend to use a lot, but well I like icing- add as little or as much as you want! If you do not prefer icing, you could always make an egg wash and brush on the scones  before baking and sprinkle some sanding sugar on top.
Serving & storing: The scones are best served immediately, but can be frozen for up to 1 month. Thaw, and reheat in a 350-degree oven for 10 minutes.
Orange Icing
1/2 cup, confectioner's sugar
zest of 1 orange
Juice of 1/2 orange


1. Combine all ingredients in a bowl and whisk to combine.
2. Once scones are cooled, drizzle on top